Your name in lights!
So you’ve built your ‘Beast - now what?
Building the MicroBeast is a fun and rewarding activity, but once successfully completed many users don’t get much further than having a couple of games of Zork before relegating the Beast to a dusty drawer and moving on to the next project.
But the ‘Beast has so much more to offer! It’s a great opportunity to learn about computer architecture and programming in a bare-bones, close-to-the-hardware style that exactly mimics the 80s home computing boom – something that simply isn’t possible on complex modern computer systems.
Why do you keep saying “`Beast” ? It’s an easy way for me to refer to both the MicroBeast (a kit you build yourself, which always has the LED display modules) and the NanoBeast (a pre-assembled board, where the LED display modules are available as an add-on).
In this series of articles, I’ll show you how to write your own scrolling messages on the MicroBeast’s glorious LED displays. We’ll start using the included Microsoft BASIC, covering the fundamentals of how to get code onto the ‘Beast, how to debug it, and how to access the hardware. We’ll work our way through a few iterations of the code to build an increasingly sophisticated application.
Then, well do the whole thing again, but in z80 assembler!
Hardware fundamentals
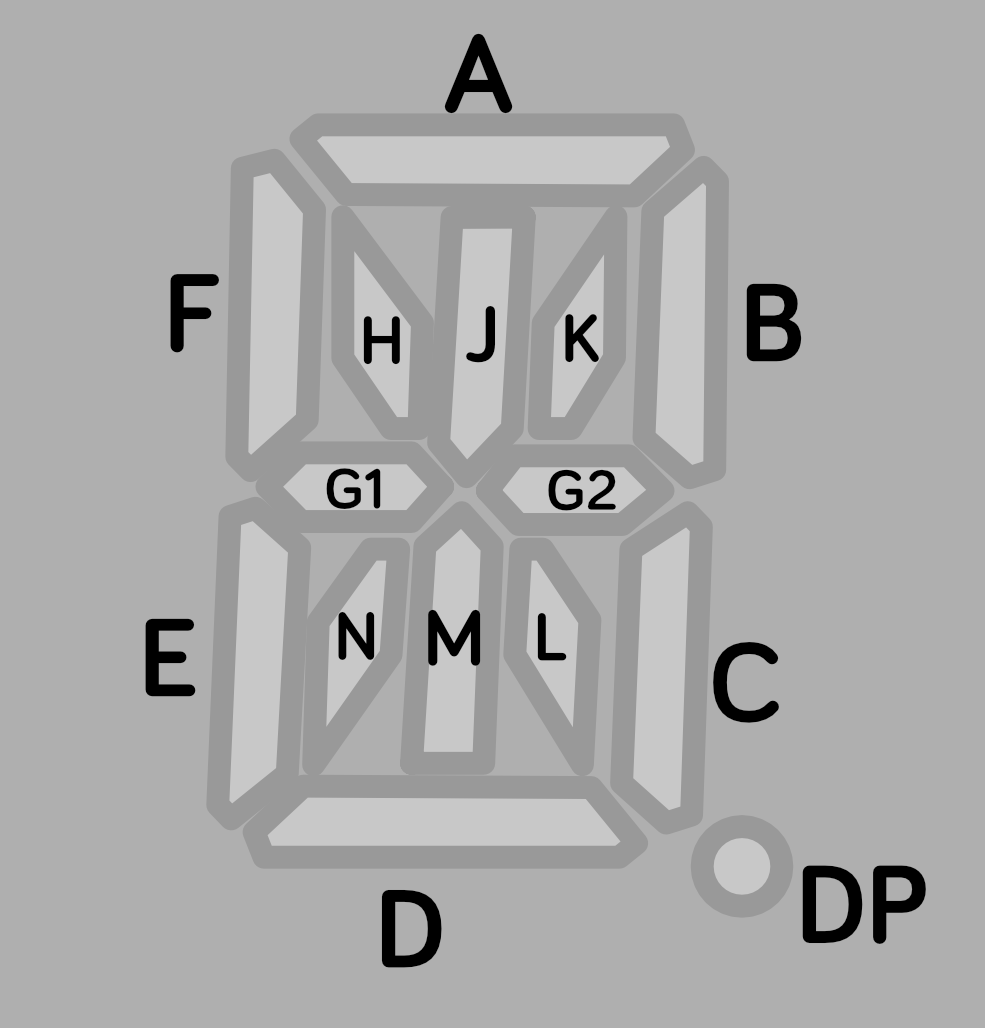
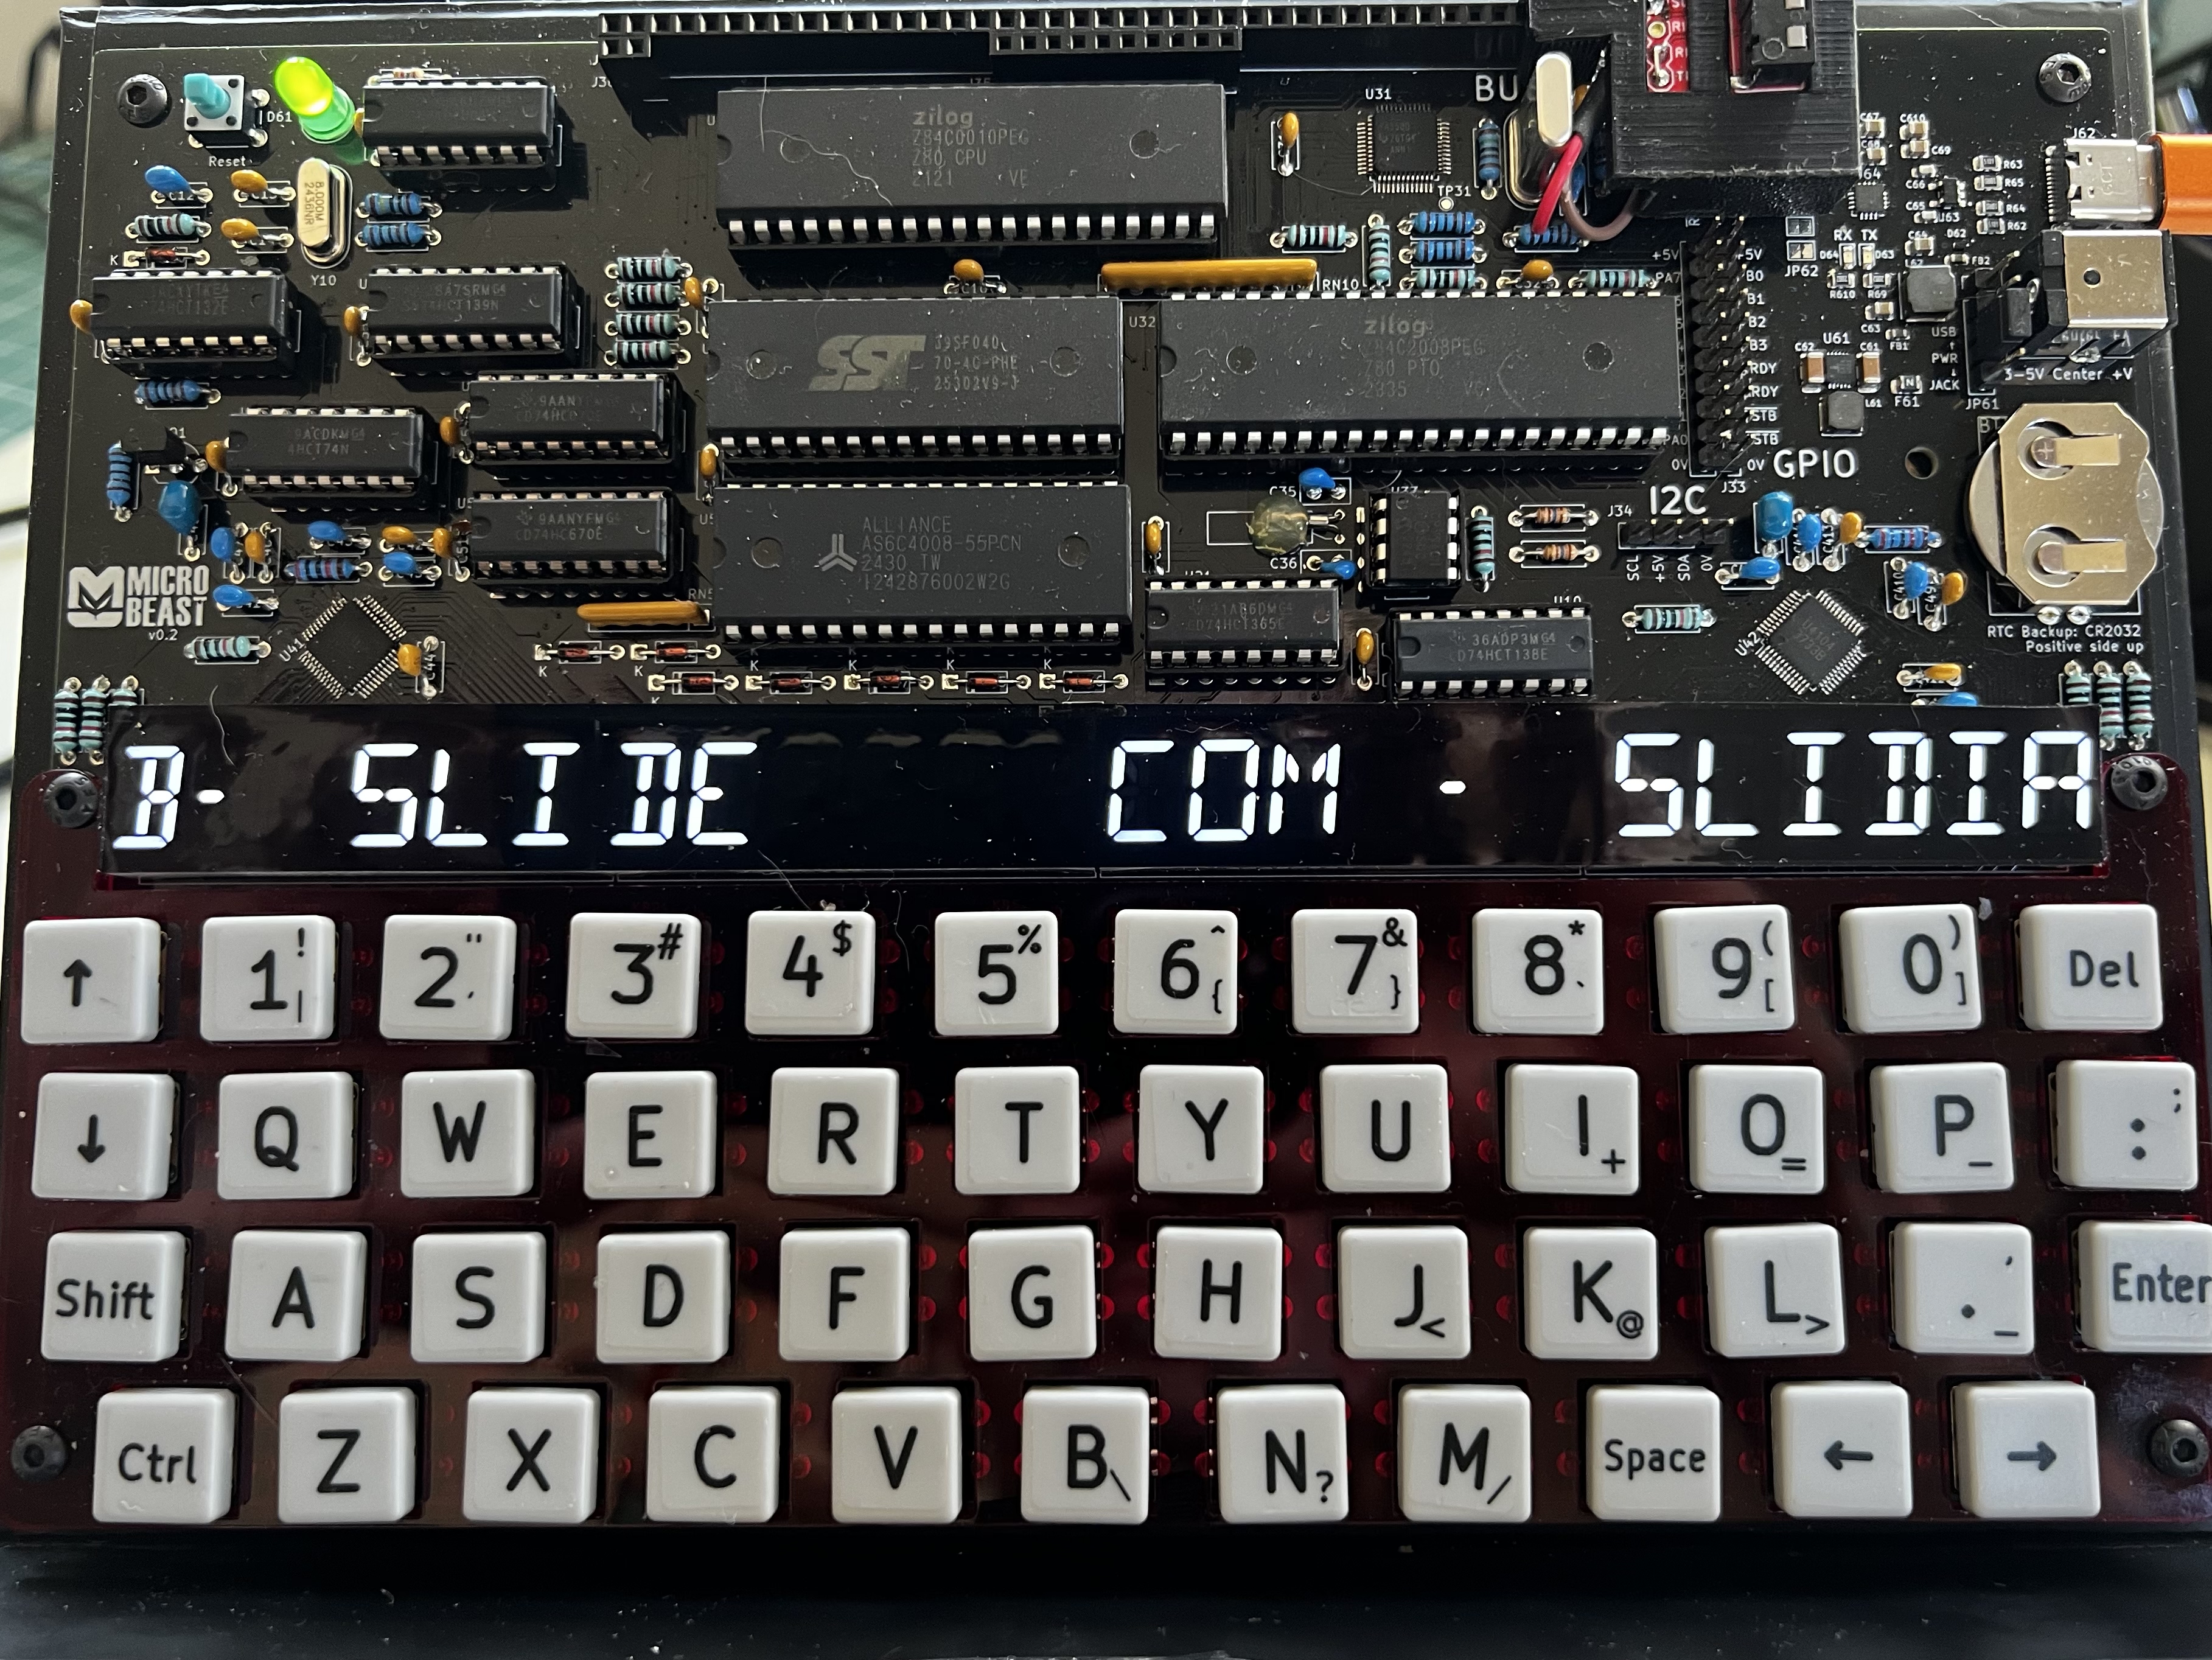
Your ‘Beast comes with a 24 character 14-segment LED display. This is provided by 4 separate 6-character Houkem 60401 AW LED modules.
Each pair of LED modules is driven by a Lumisil IS31FL3733B LED driver.
Each digit has 14 lamps or “segments” that we can turn on to form the shape of the symbol we want to display (there’s actually a 15th - every character has a decimal point in the bottom right).
Firmware fundamentals
Your ‘Beast comes equipped with CP/M 2.2 - a state of the art (for 1980) operating system which includes as its most fundamental layer the BIOS (Basic Input/Ouptut System) which deals with the nitty-gritty of the ‘Beast’s specific hardware. Above that layer sits the BDOS (Basic Disk Operating System), which provides a consistent API for accessing machine features that is common across all CP/M computers: by writing code to target this API you can ensure that your software will run on a wide array of CP/M computers regardless of manufacturer. Finally at the top of the stack is the CCP (Console Command Processor) which is the bit you interact with when you’re typing commands in to the ‘Beast.
The traditional advice is always to code to the BDOS and never to the BIOS in order to maximise the compatibility of your code. We’re going to ignore that advice, because we want to talk to those LED displays, and they are not a standard CP/M feature.
CP/M disks
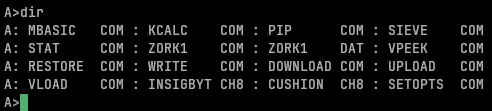
When your ‘Beast boots up, you have an A: drive which is read-only and which includes a few programs to get you started. Zork is one, and MBasic is another - it’s the latter that we’ll be initially experimenting with.
Use the dir command to look at your A drive:
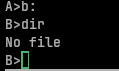
You’ve also got a second disk, B: which is writeable, unlike A:. This is called a RAM disk, and its main drawback is that its contents will be lost if you reset the ‘Beast. Initially it is empty:
Happily there is a solution: a utility on the standard A: drive called WRITE which will copy your RAM disk into the ‘Beast’s non-volatile memory: that is, memory that survives a reboot/power-cycle. The corresponding utility RESTORE performs the reverse process, copying the non-volatile backup back to the RAM disk so that you can continue working.
You’ll soon get into the rhythm of RESTORE, work on some stuff, WRITE. Inevitably sometimes you will forgot to RESTORE, forget to WRITE, or get the order wrong and write a blank RAM disk over your precious non-volatile copy. That last one can be especially devastating, so we need a more robust approach to saving our creations.
Cross-development
The solution is to keep our files on a modern computer and work on them there with the convenience afforded by modern editors and tools before transferring them over to the ‘Beast for testing.
I’m not covering it here, but it’s also possible to work entirely on your PC and use its power to emulate the MicroBeast hardware with the BeastEm emulator that Feersum Technology provides. BeastEm also allows you to stop the processor and inspect memory and registers, and is the best way to debug new code.
To transfer files, I’ll be using a utility called SLIDE. Go ahead and download the latest release now, we’re going to need it shortly.
SLIDE is a pair of programs: one that you install on your PC, and one that you install on your ‘Beast. Once installed they can send files to each other with ease.
That does present us with one challenge though: how do we get the SLIDE program onto our ‘Beast?
Y-Modem
Slide is a modern protocol designed to take full advantage of the ‘Beasts relatively fast serial connection, but back in the 80s serial ports were a lot slower, mostly narrower, and generally less reliable. Hackers of the day came up with various file transfer programs, one of which is the venerable Y-Modem.
The good news is, every ‘Beast has Y-Modem compatibility baked into its firmware. The bad news is that Y-Modem was never a standard, just a loose collection of ideas, and consequently there are a vast number of mutually incompatible Y-Modem implementations out there.
I’ll take you through the process on Linux and Windows, using tools that I know work. Sadly, I can’t do the same for a native app on MacOS, as I’ve yet to find a compatible Y-Modem implementation for modern Mac computers, but with a couple of extra steps you can use the same tools as the linux example - it ain’t pretty, but it works.
On the ‘Beast side
We’ll cover the ‘Beast side first, as it’s common to all the other workflows. The ‘Beast’s firmware has Y-Modem built in, but we need to activate it:
- hold down the 0 (zero) key, and press and release the RESET button.
- your ‘Beast will beep and go through its power-on self test, but it will stop in its monitor program and not doing any further booting that you might have set it up to do.
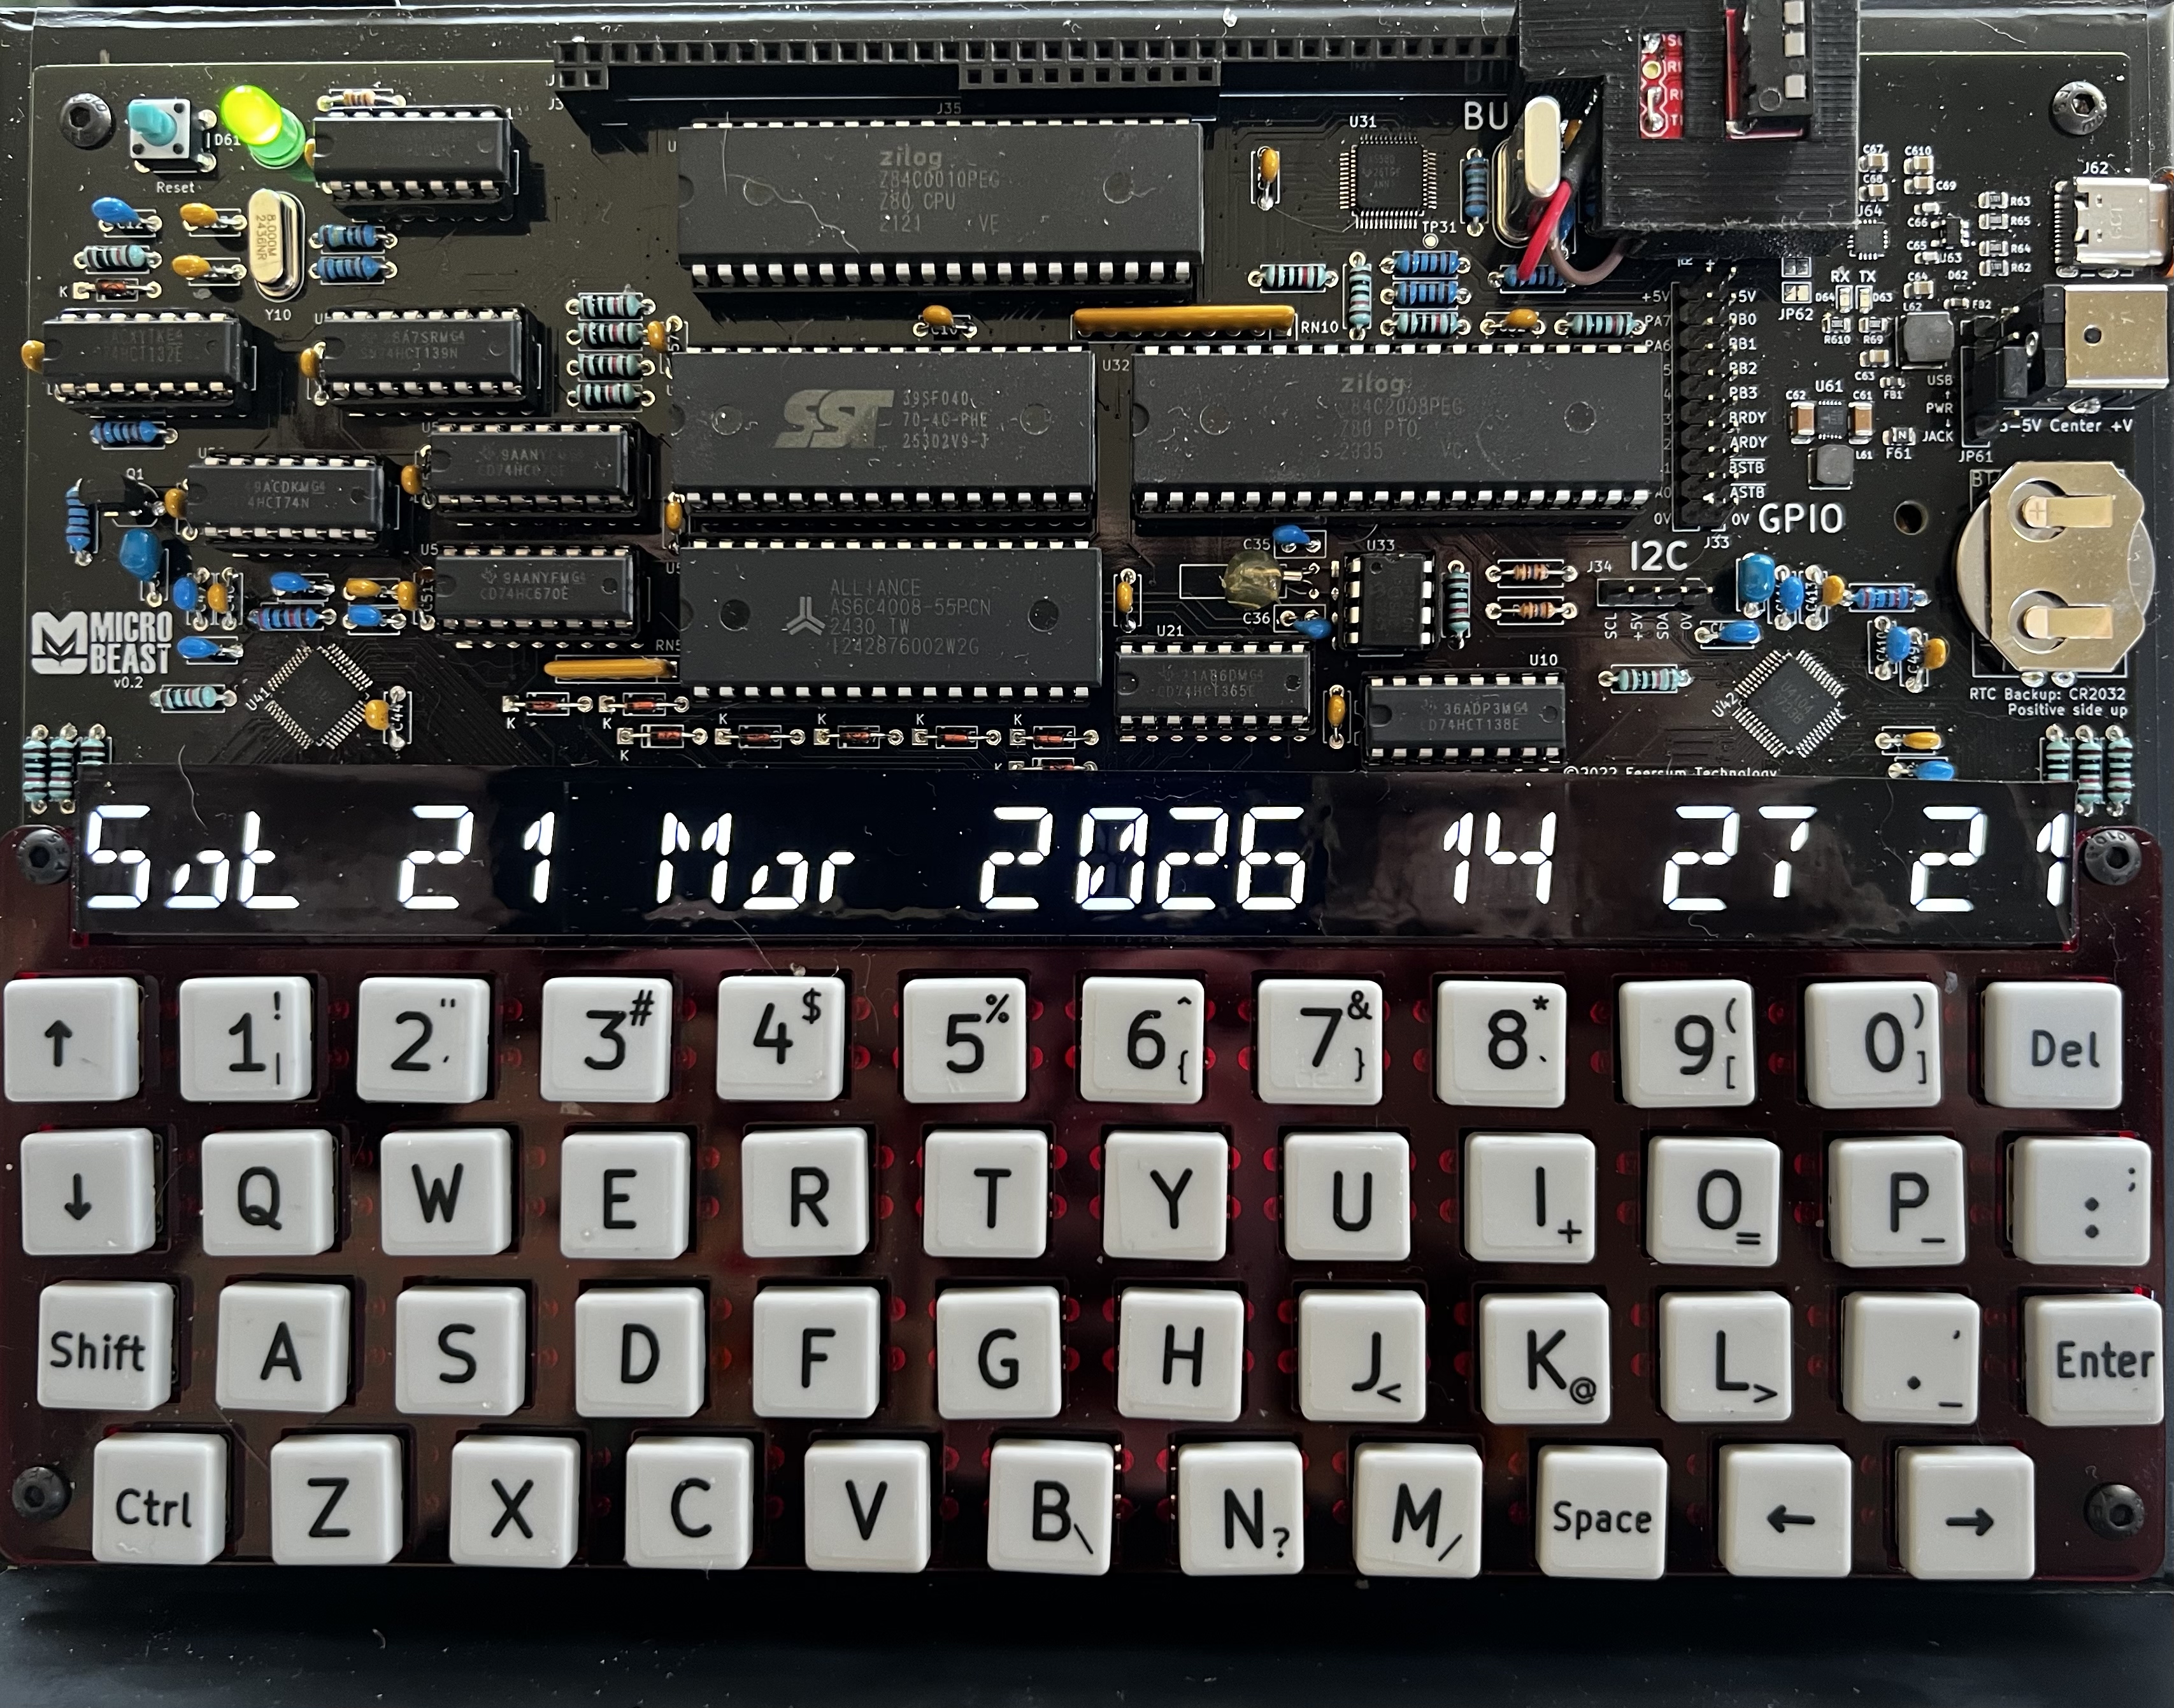
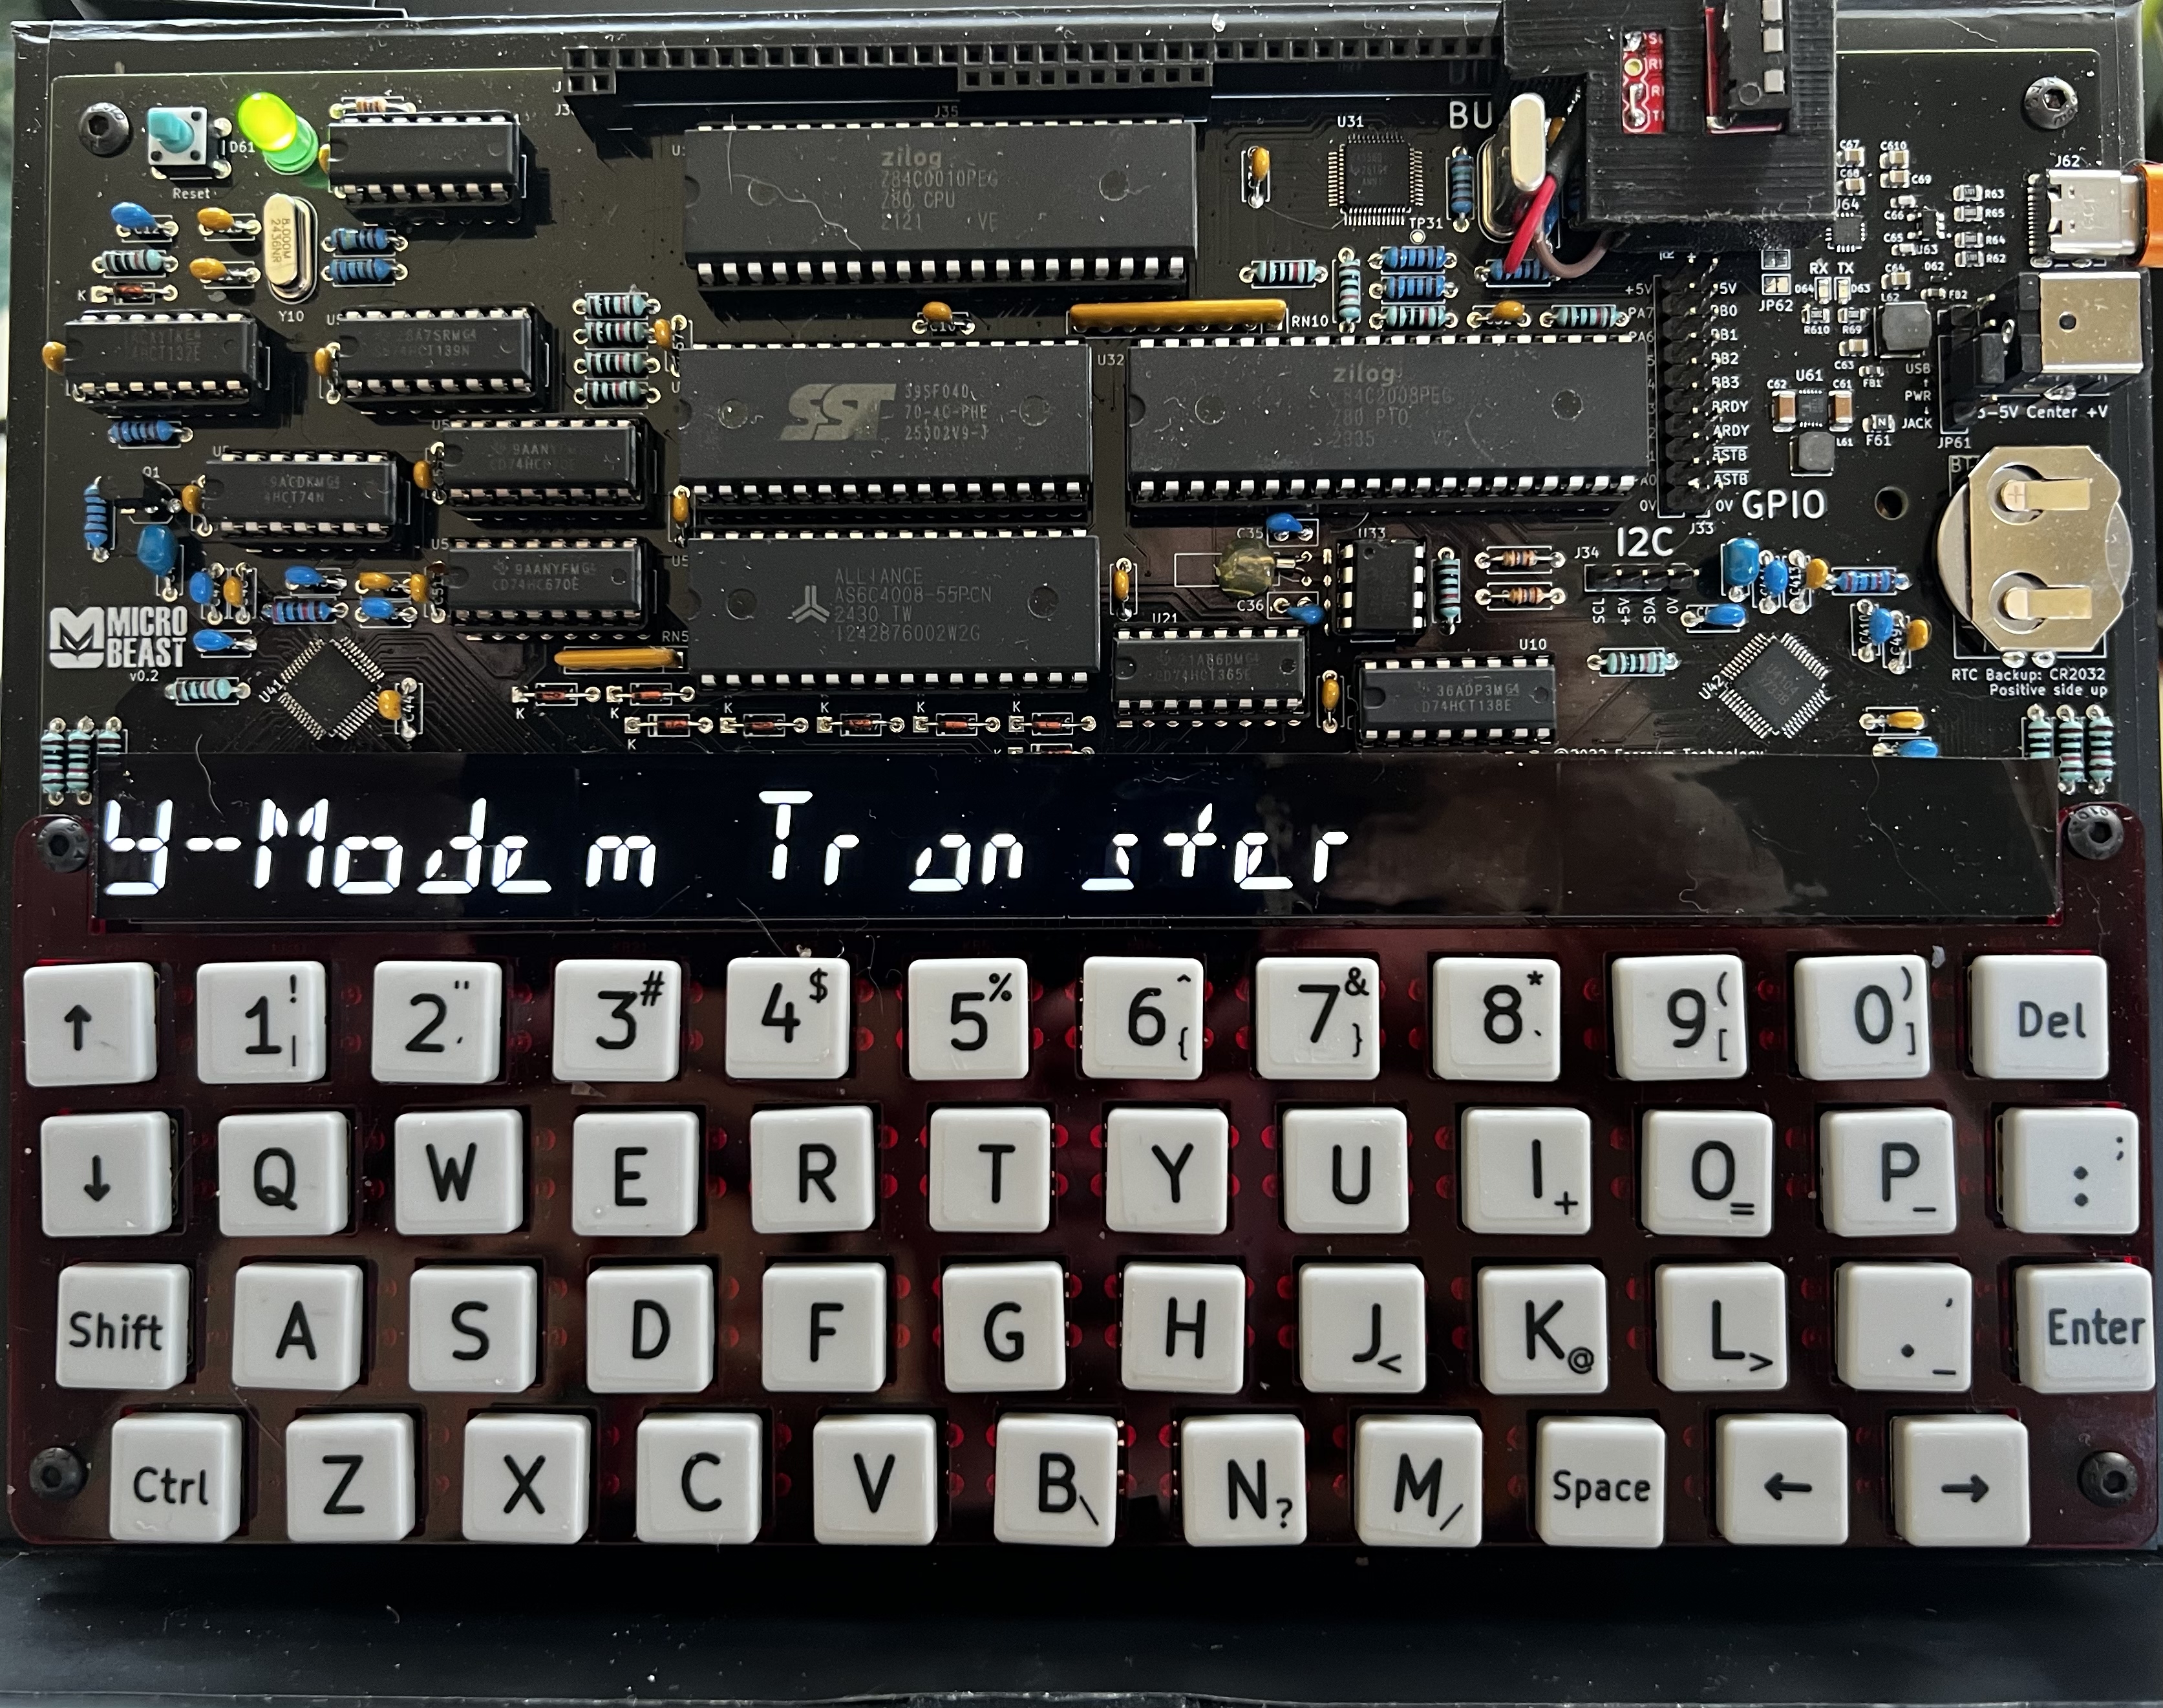
- once the ‘Beast is showing you its clock, use the UP arrow key to select
Y-Modem transferand press ENTER.
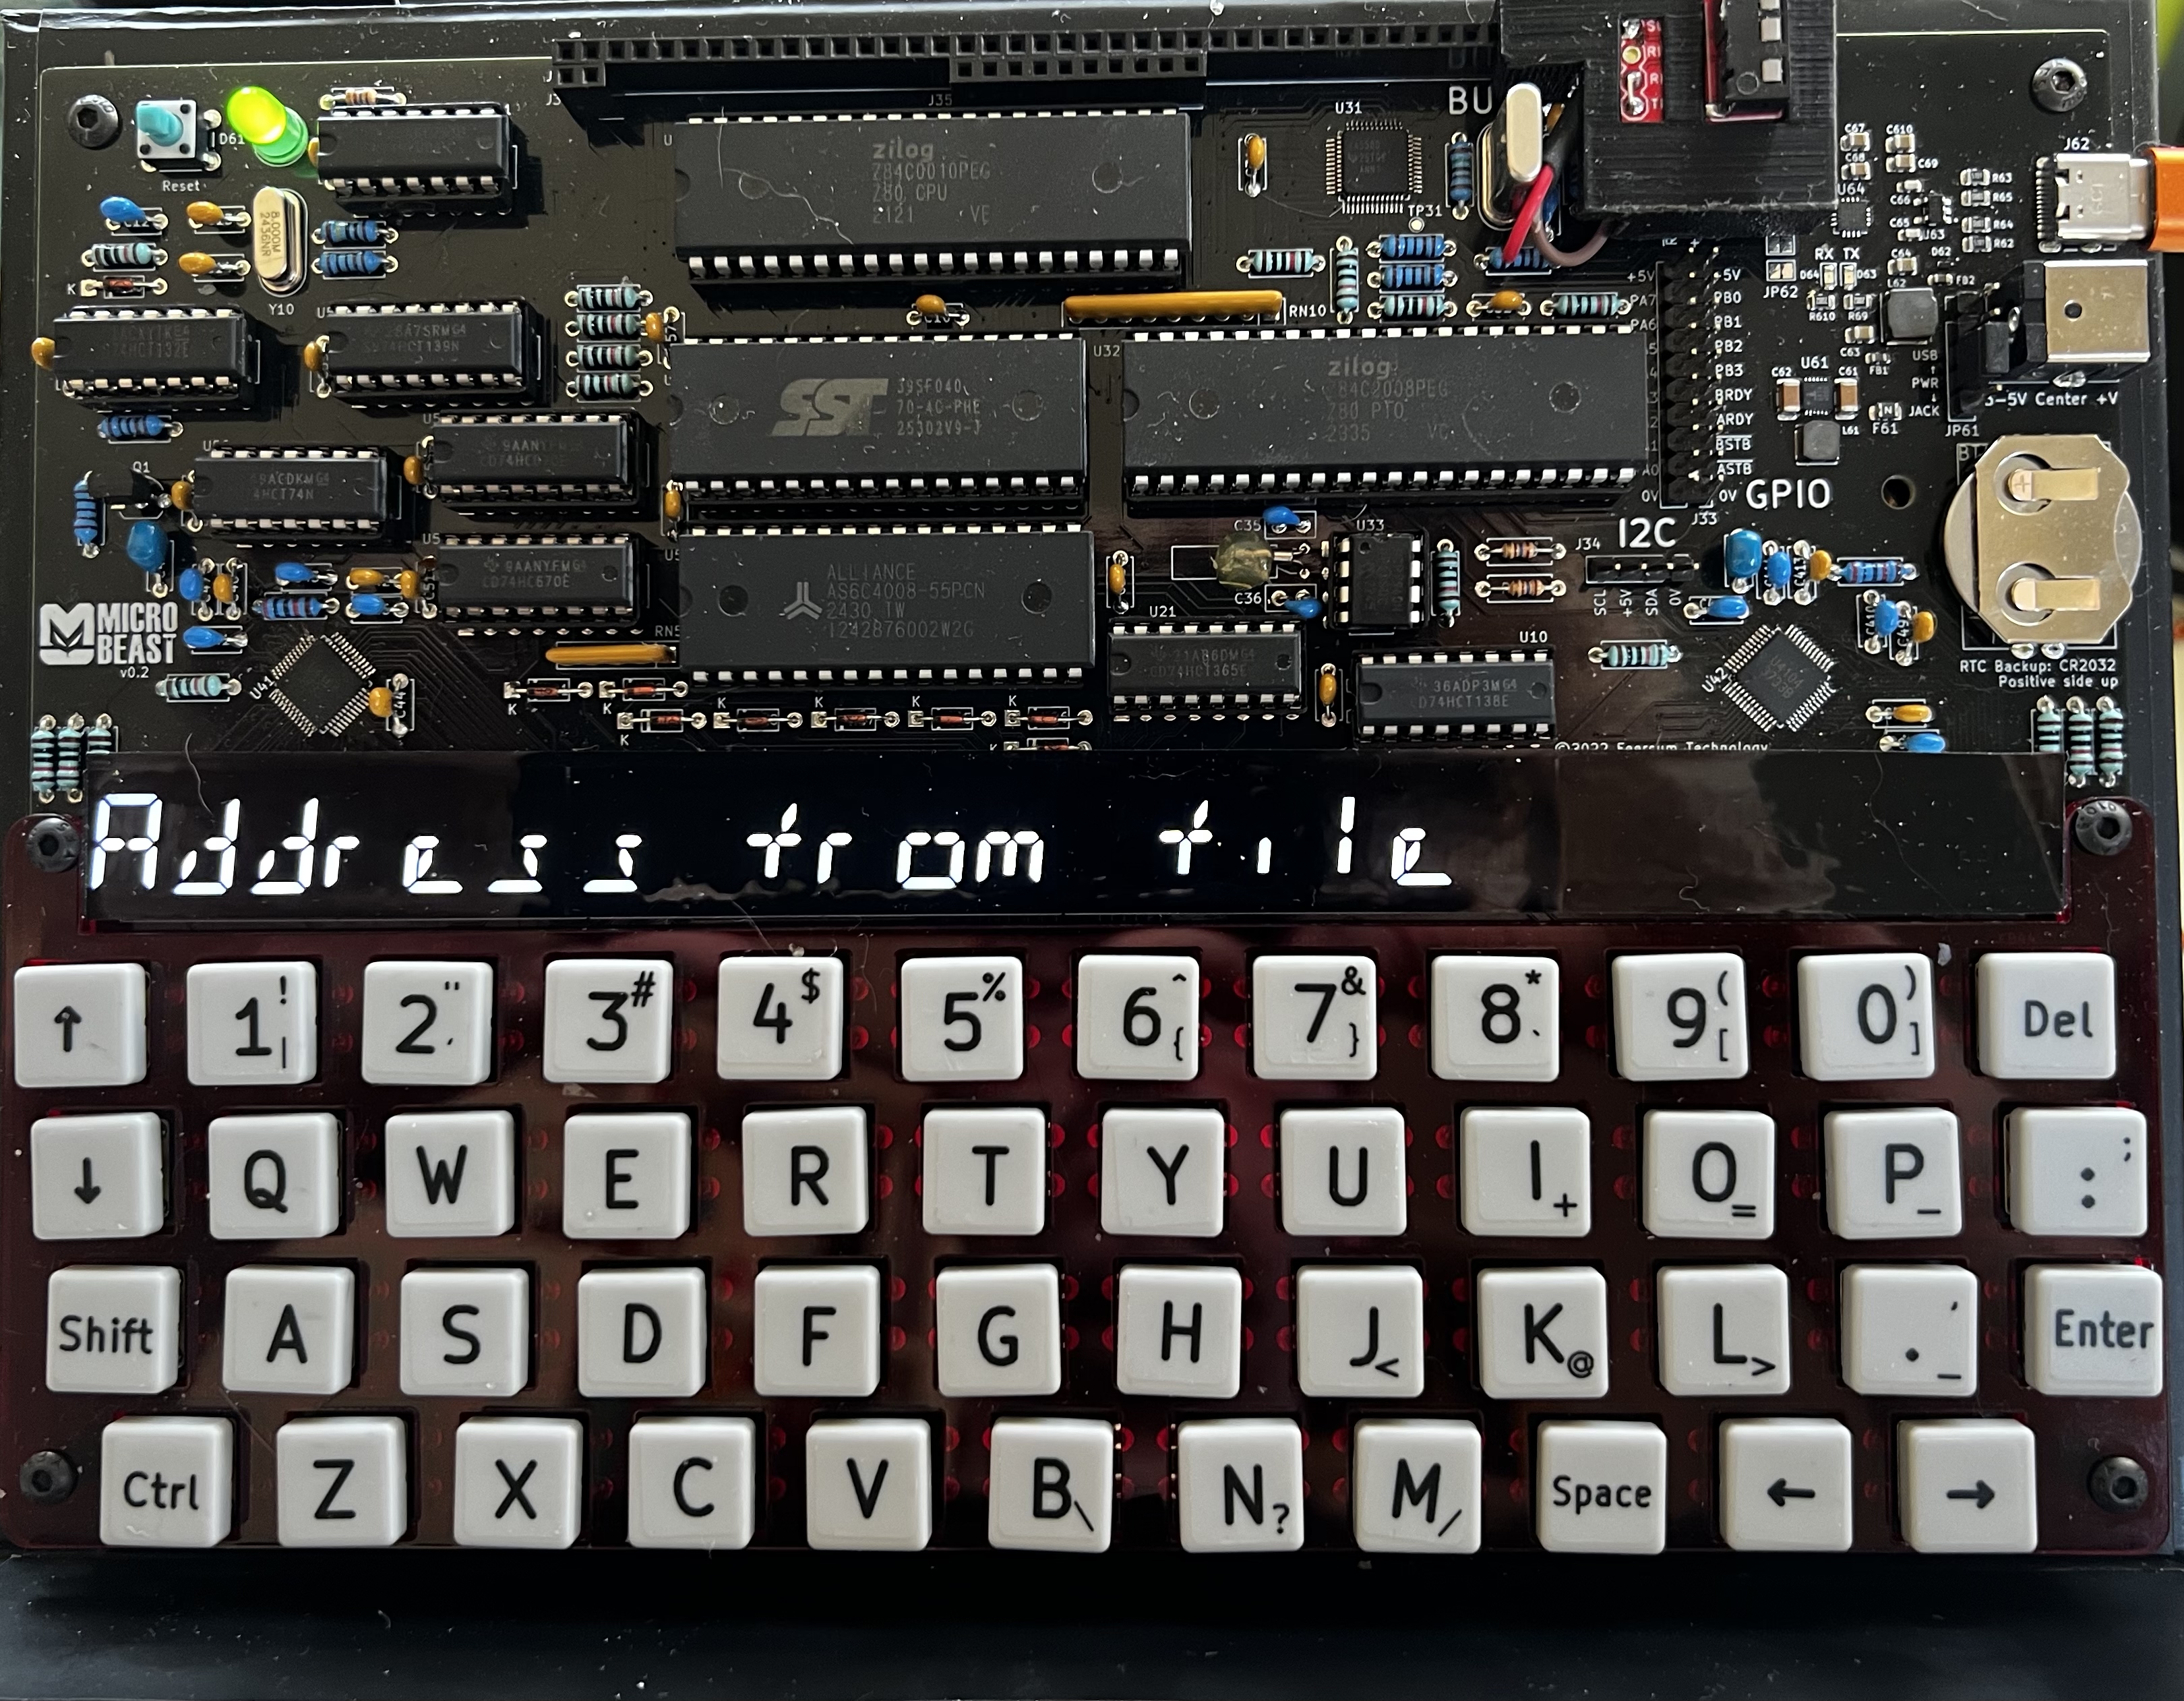
- Use the arrow keys to select
Address from fileand use ENTER to select it.
- The ‘Beast should now say
Start transfer
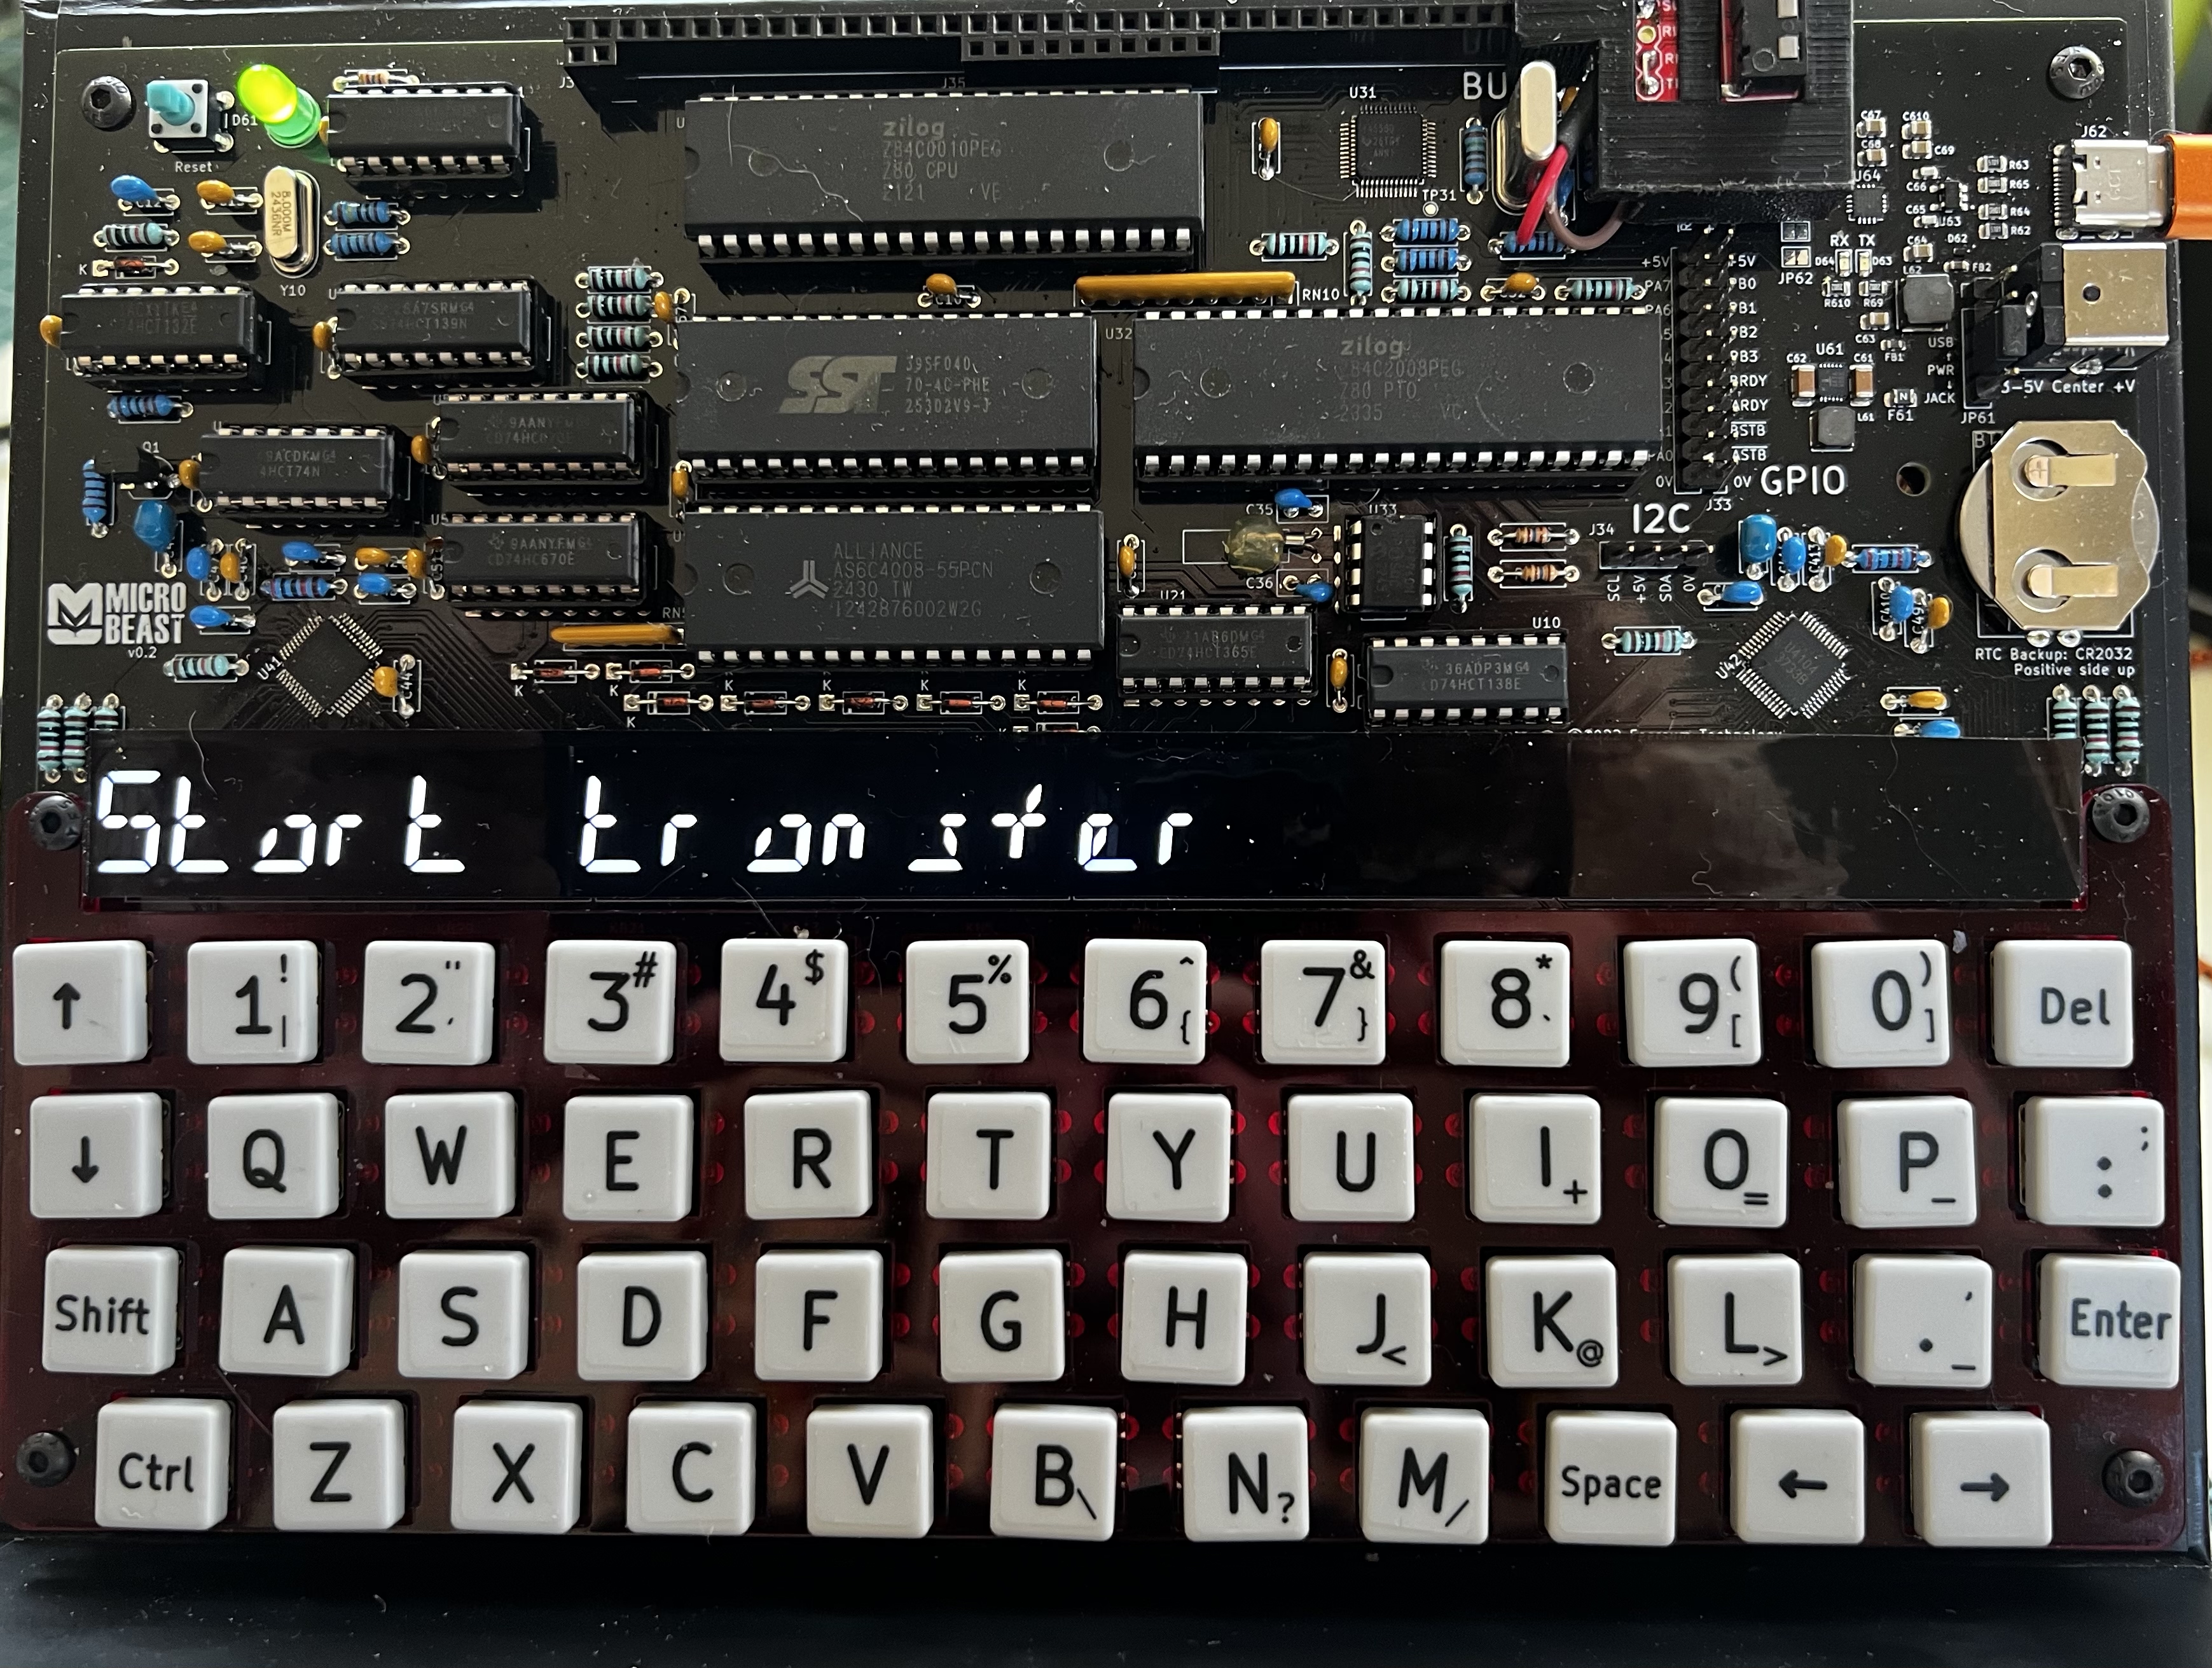
- Use one of the PC-side workflows below to send a disk image file over
- After the file has successfully transferred, the beast will show you a screen like this:
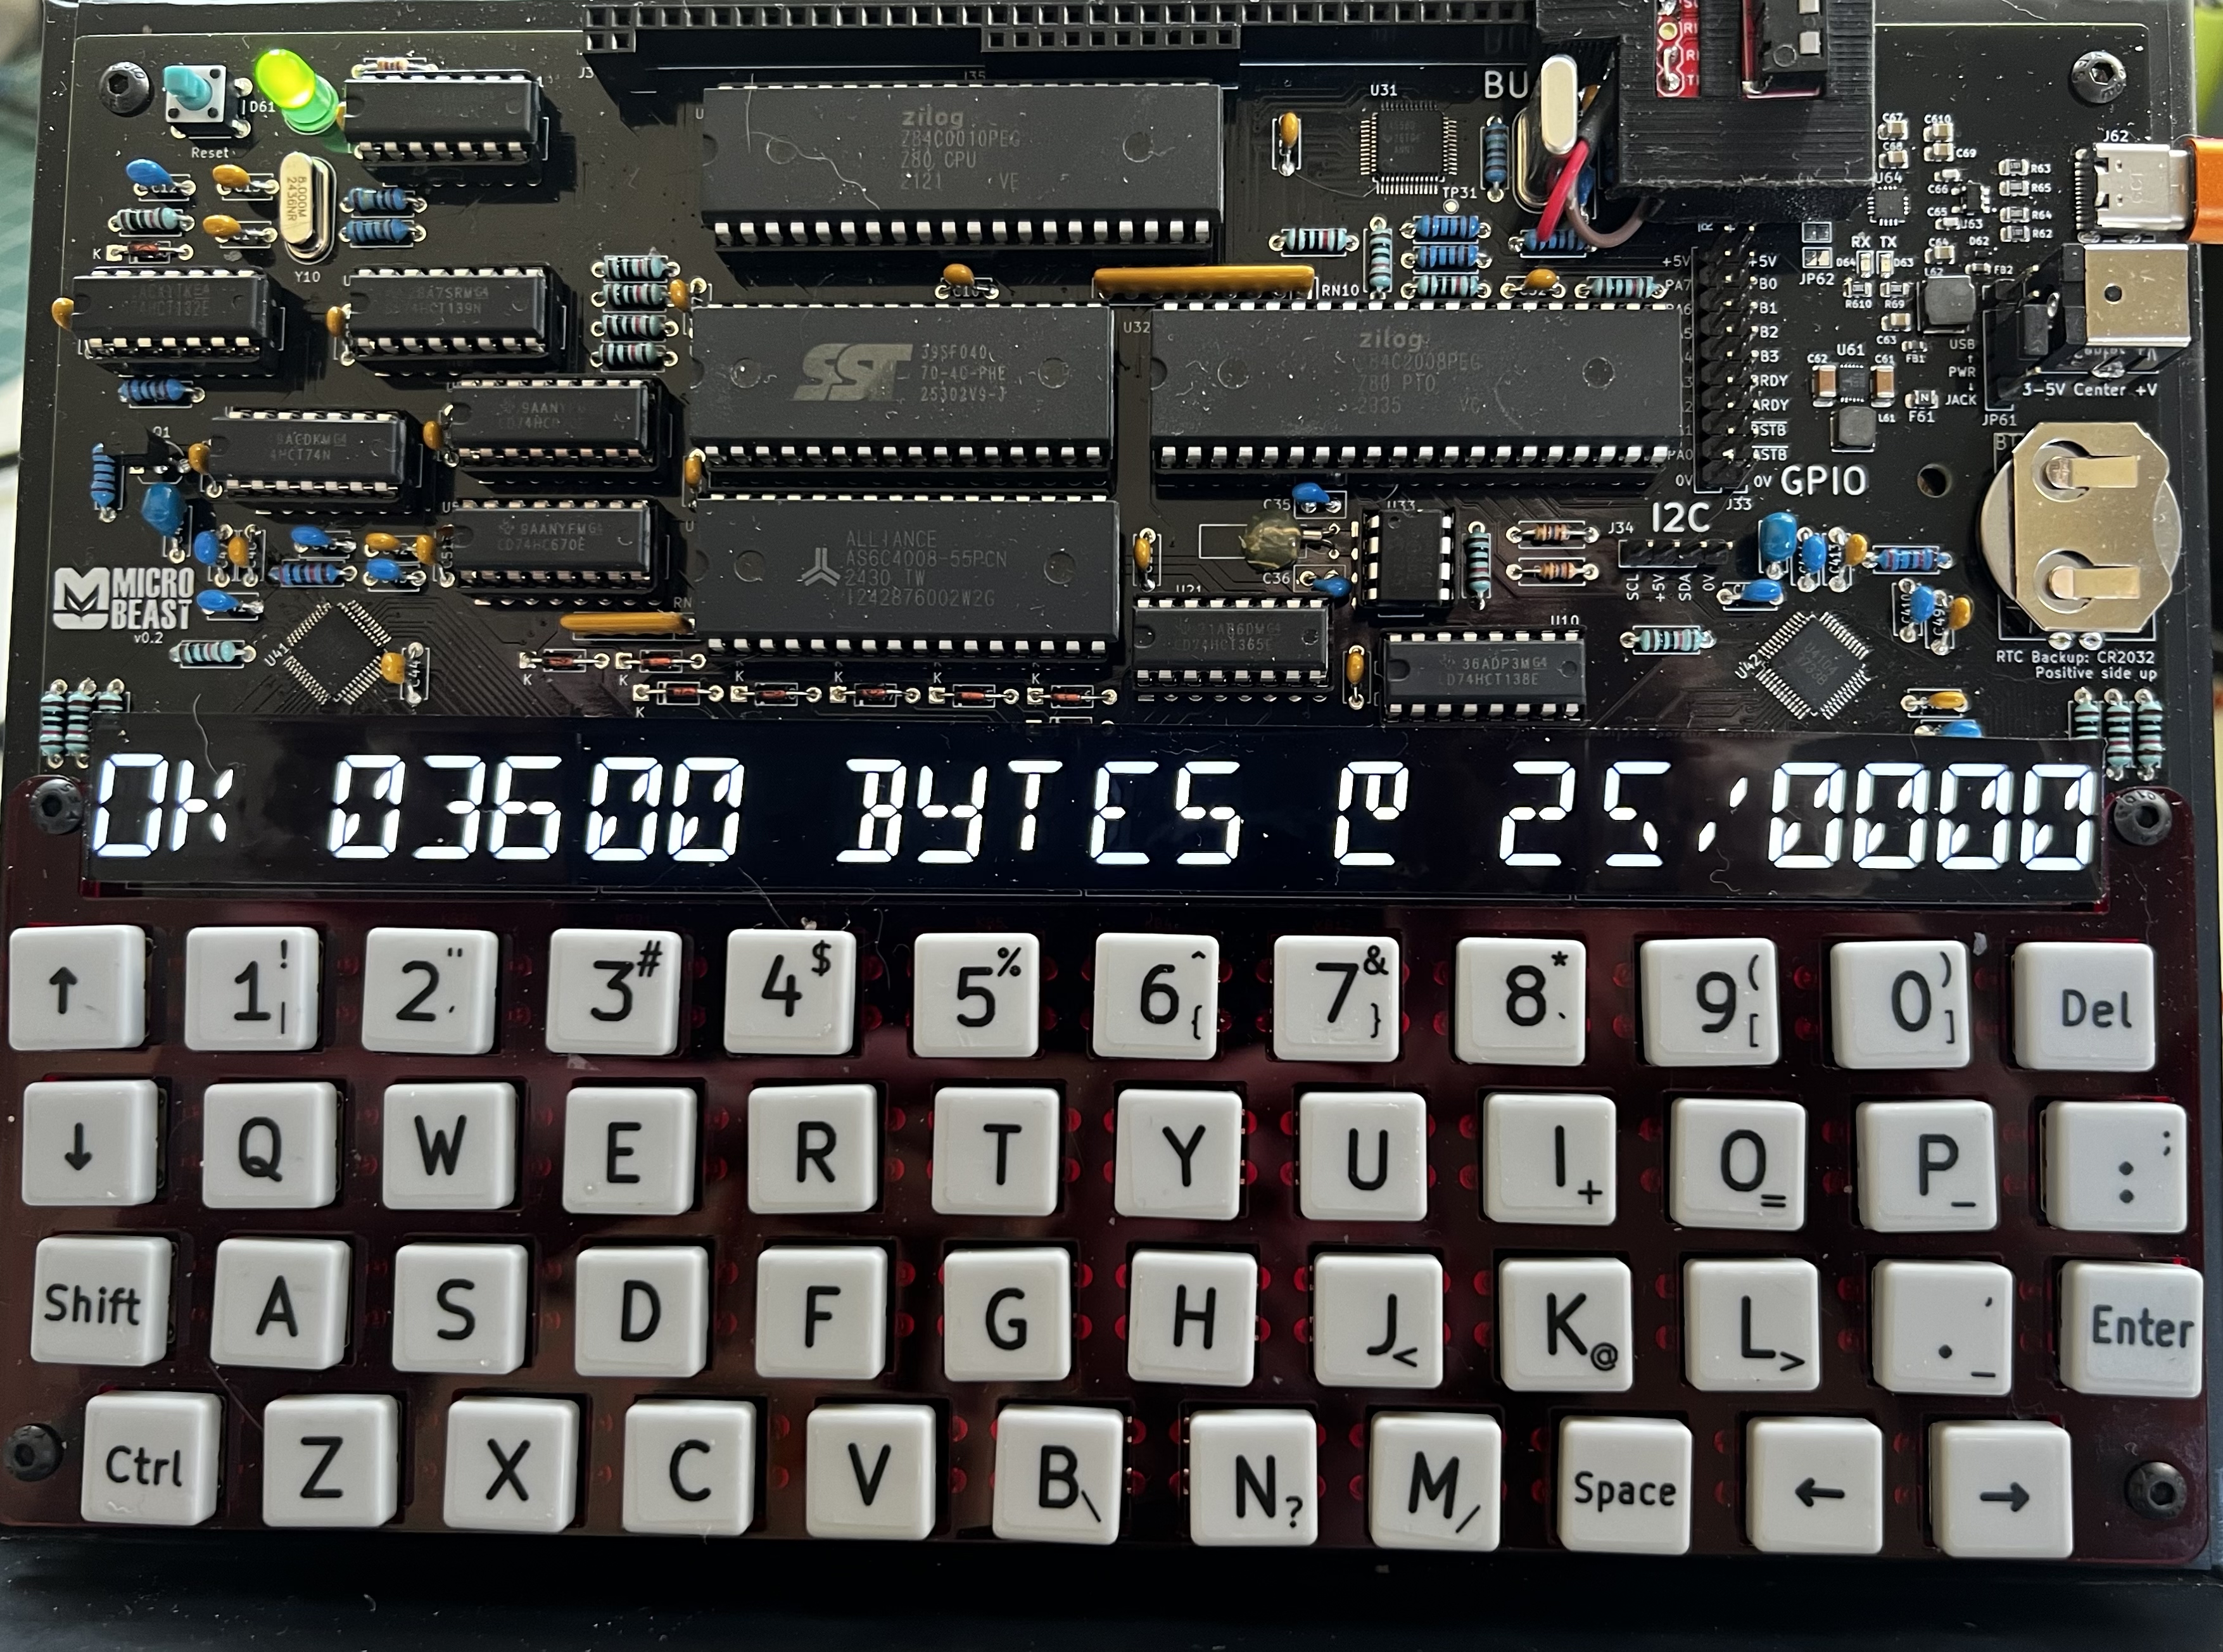
Quickly use the arrow keys to select
CPM Drive Band press ENTER to select it.- The ‘Beast will boot CP/M, but with the image file you just sent over as the
B:drive. - switch to that drive with
B:and then typedirand you should be able to see theSLIDE.COMbinary on there. If you can’t because it all whizzed by too quickly, hold CTRL and press UP arrow to scroll back through the virtual console.
- At this point I like to go back to
A:and use theWRITEcommand to save the new disk image we just transferred over as my new non-volatile disk. This means in future I can boot the ‘Beast, typeRESTORE, and immediately have access toSLIDE.COMso I can get started quickly.
DO NOT DO THIS if you already have precious work on your B drive that you want to keep! The SLIDE disk image will entirely replace your non-volatile disk image, erasing anything that’s already stored in there.
On the PC side
Let’s now look at what we need to do on the PC side to carry out step 6 above.
Using linux
On Linux we’re going to use the venerable minicom tool. Appropriately enough it’s the same vintage as the CP/M that’s running on the ‘Beast. We’re also going to need the lrzsz package which provides the sb command that we’ll use to handle Y-Modem.
- On a debian/ubuntu system, installation is easy:
1
sudo apt install minicom lrzsz
- Next we need to plug the ‘Beast into our computer with a USB serial cable, and figure out the relevant serial port device. I tend to use
sudo dmesg | grep ttyfor this and look for the device name:

then I use ls /dev/tty* to verify:

so here the device we need is /dev/ttyUSB0 - make a note of yours, we’ll need it in the next step.
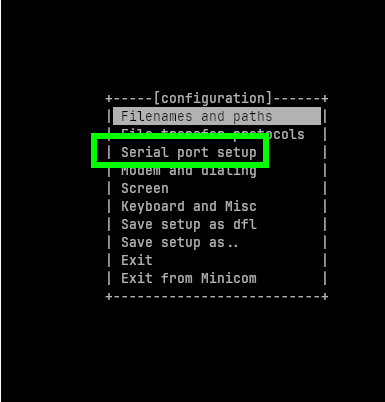
now we need to setup minicom. Run
sudo minicom -s- the-smeans “setup”.Navigate down to
serial port setup:
- Hit enter, and make your serial port setup look like mine:
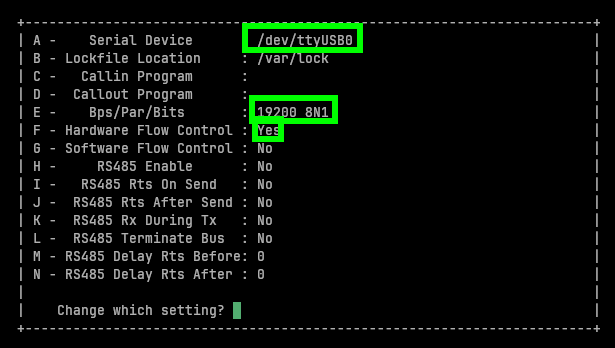
Press A and edit the serial device we discovered earlier. Press enter to accept.
Press
Eand then keep pressingAuntil the baudrate is19200. PressQto set8N1in one go. PressENTERto finish and go back up to the Serial Port settings menu.Press
Fand change the hardware flow control toYes.PressENTERwhen done to go back to the main settings menu.Now navigate to
file transfer protocols:

- again make yours look like mine:

The crucial part is the Y-Modem line. Press B and edit each field in turn, hitting
ENTERat the end of each field until you’ve done them all.Press
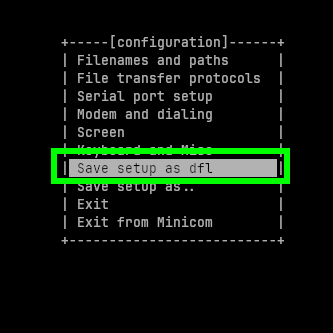
ENTERagain to finish and go back to the main settings menu.This time, highlight
save as dfl(Save as default) and hitENTER.
- Finally hit
Escapeto leave the setup screen and enter minicom’s main screen:
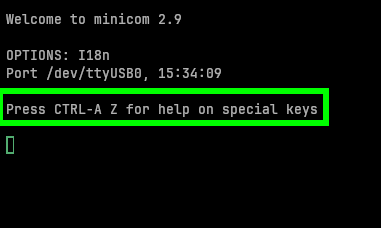
Note that you can hit CTR-A Z to get back to the menu (highlighted in the screenshot). You can use this to change the settings, and we’ll also use it later to kick off a file transfer. You can type CTRL-A Q to leave minicom. The next time you want to start minicom it’s just sudo minicom (without the -s this time as we don’t need to run setup again).
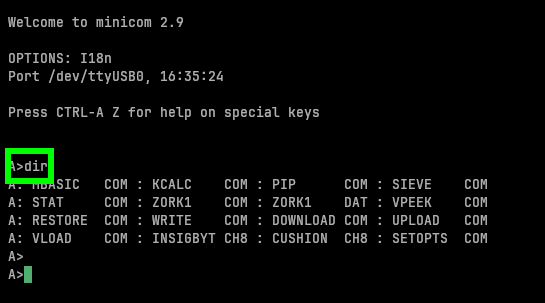
In this screen anything we type gets sent to the ‘Beast, and anything the ‘Beast responds with is sent to our terminal:
- When the ‘Beast is in “Start transfer” mode (step 6 in “On the Beast Side”) it wants us to send program data rather than type commands. We can do this in minicom with
CTRL-A S(for “send”):
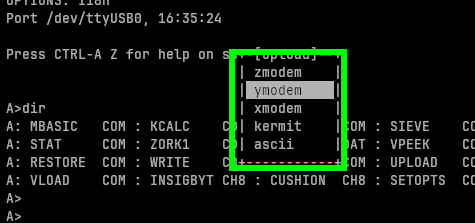
Select
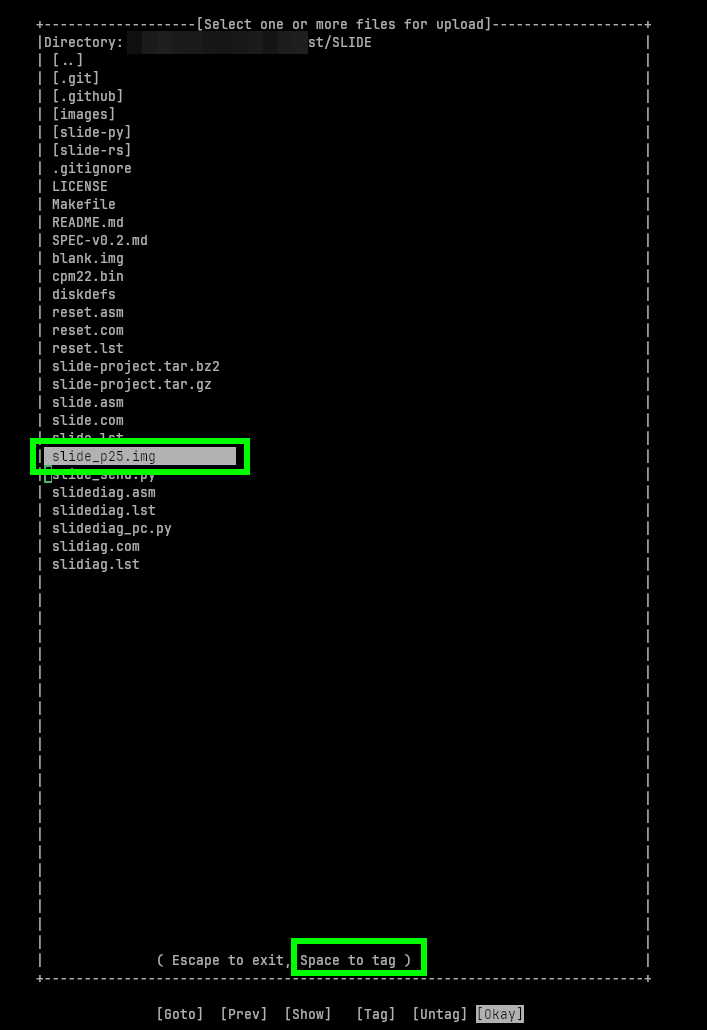
ymodemand hitENTER.In the screen that follows, we select the file that we want to send. You can use
SPACEto tag/untag a file. Y-Modem lets you tag multiple files, but be careful to only select one. You can enter a sub-directory by double-tappingSPACE, and double-tap on the[..]to go back up to the parent directory. Make sure you have theslide_p25.imgfile selected, and then hitENTERto start the file transfer. If you want to bail without starting the transfer, hitEscape.
- You’ll see the file transfer dialogue open and begin to track the file upload progress. It can take a while!
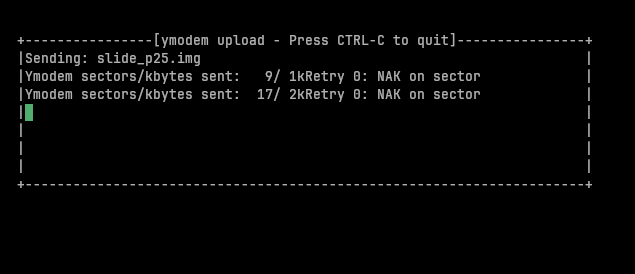
- Eventually you’ll be rewarded with:
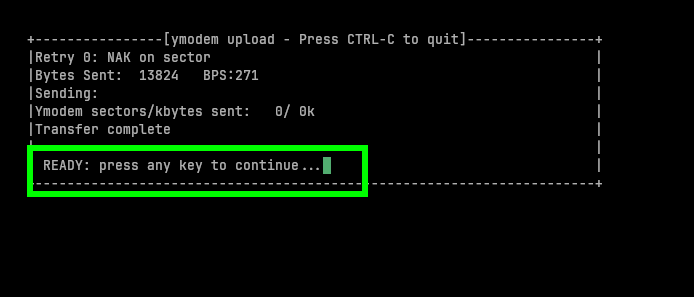
Hit
ENTERand thenCTRL-A Qto exit minicom.Attend to business on the MicroBeast side!
Using MacOS
This is basically the same as the Linux approach, but you’ll need to install minicom and lrzsz first. If you’re using homebrew you can:
1
brew install minicom lrzsz
and once those are installed OK, you can follow the linux instructions above.
Using Windows
On Windows the recommended approach is to use TeraTerm Pro.
- Download the installer and install it.
- Plug the ‘Beast into your windows PC
- Select a “Serial” connection, and choose the COM port that your ‘Beast is connected to.
- Click
Setupand thenSerial port...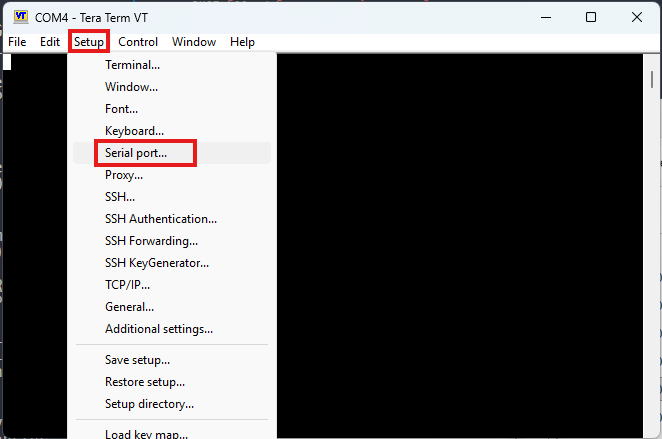
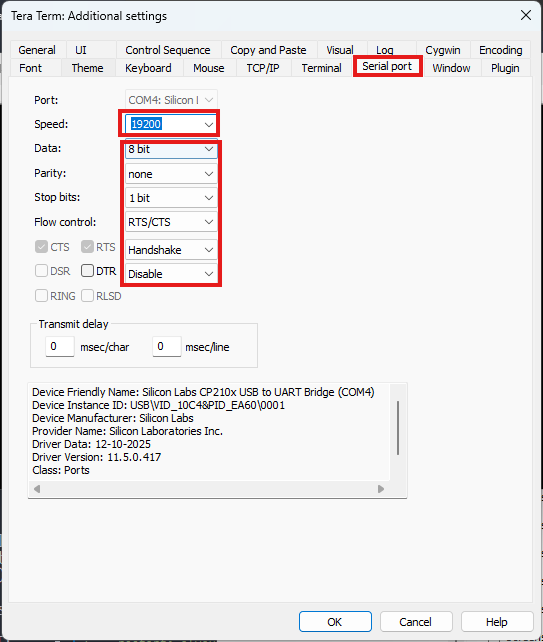
- Make your settings look like mine: 19200 baud, 8N1 (8 data bits, no parity, 1 stop bit, hardware RTS/CTS flow control):
- I like to
SetupthenSave setup...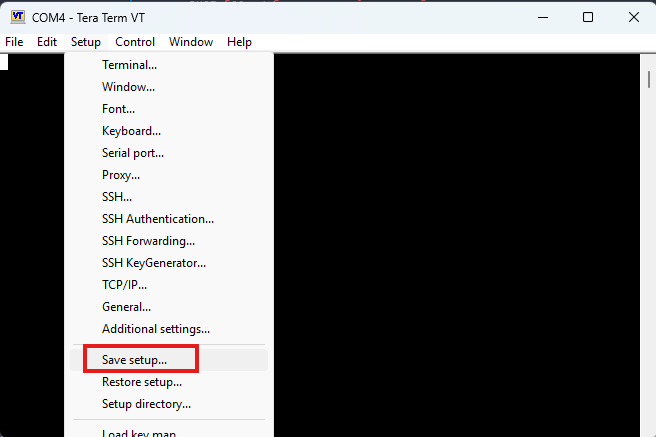
- and save it in
TERATERM.INIso that it’s loaded when the app starts next time: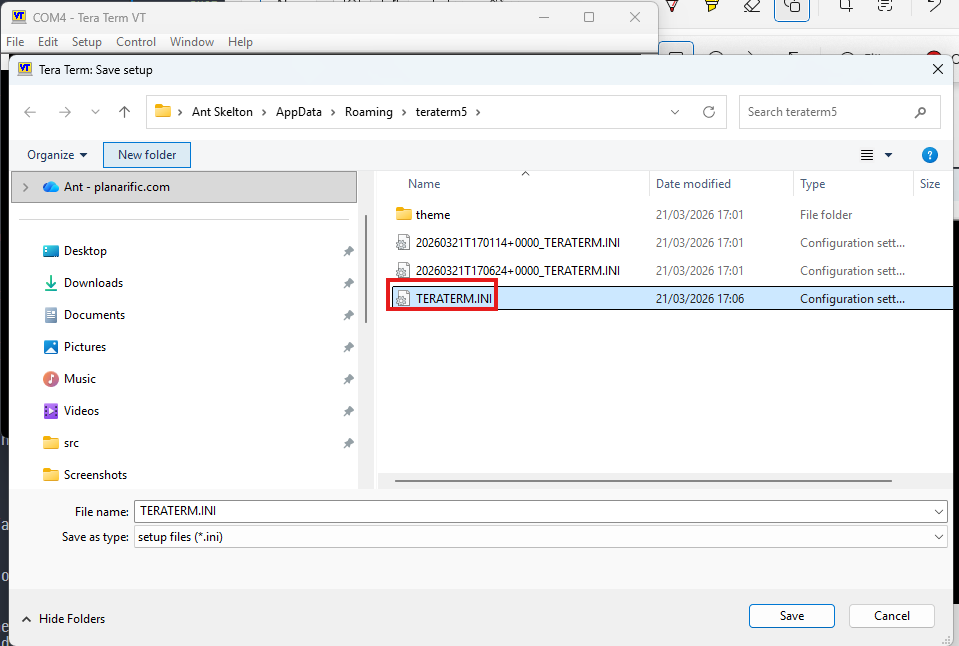
- now we should be able to communicate with the ‘Beast:

- Make sure the ‘Beast is ready (i.e. in “Start transfer”) mode
- Select
FilethenTransferthenYMODEMthenSend..: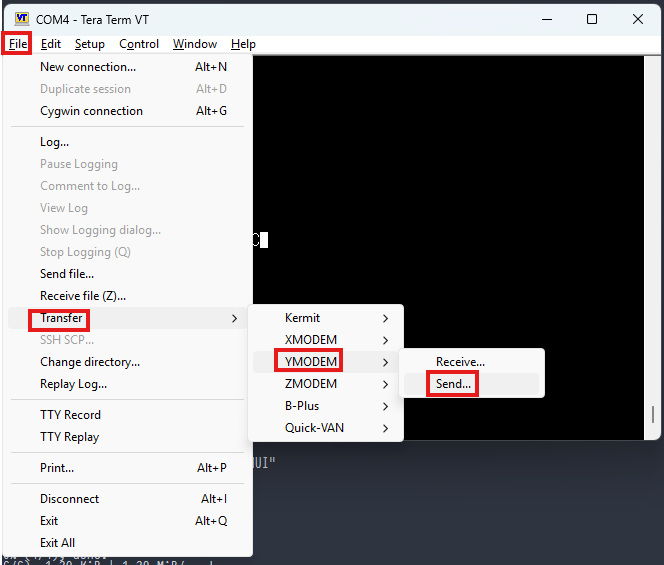
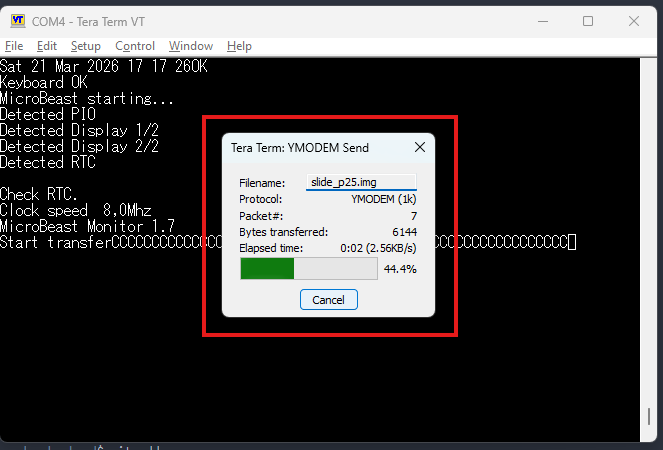
- Pick the
slide_p25.imgdisk image file: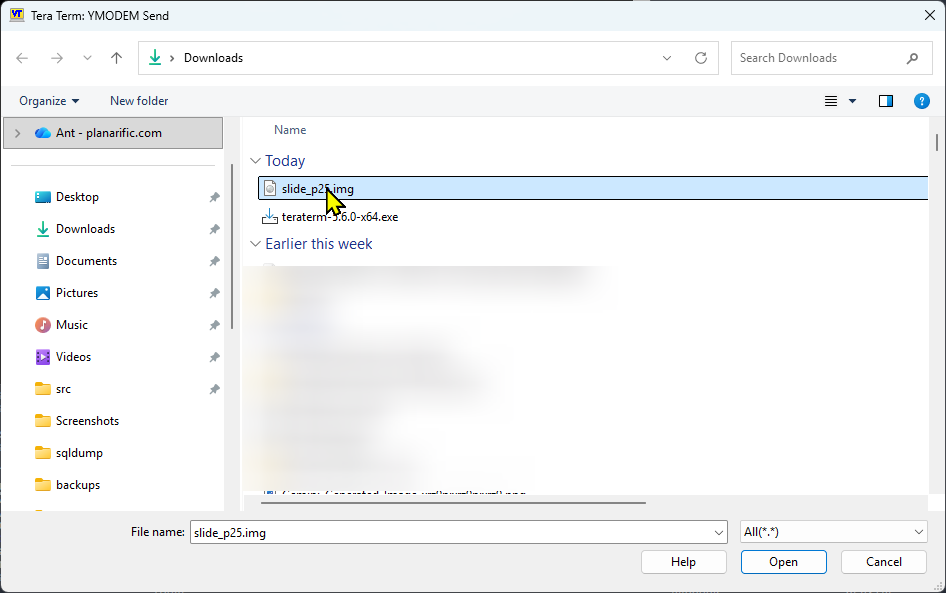
- The transfer begins:
End of Part One
Congratulations if you’ve made it this far! You’ve learned all the steps needed to get a disk image onto your ‘Beast, and we’re well on our way to being able to use SLIDE to conveniently transfer files. A lot of what you’ve learned (YMODEM etc) is directly applicable to firmware upgrades also, so these skills will prove very handy.
In Part Two we’ll write our first program and send it over to the ‘Beast using SLIDE!